
Today, I’m kicking off a new project—taking my 24×23 detached garage completely off-grid.
I’ll be plugging my system into a traditional residential subpanel, so if I want to take it on-grid in the future it’ll be an easy conversion. This setup also makes it really easy to test out different configurations for you guys.
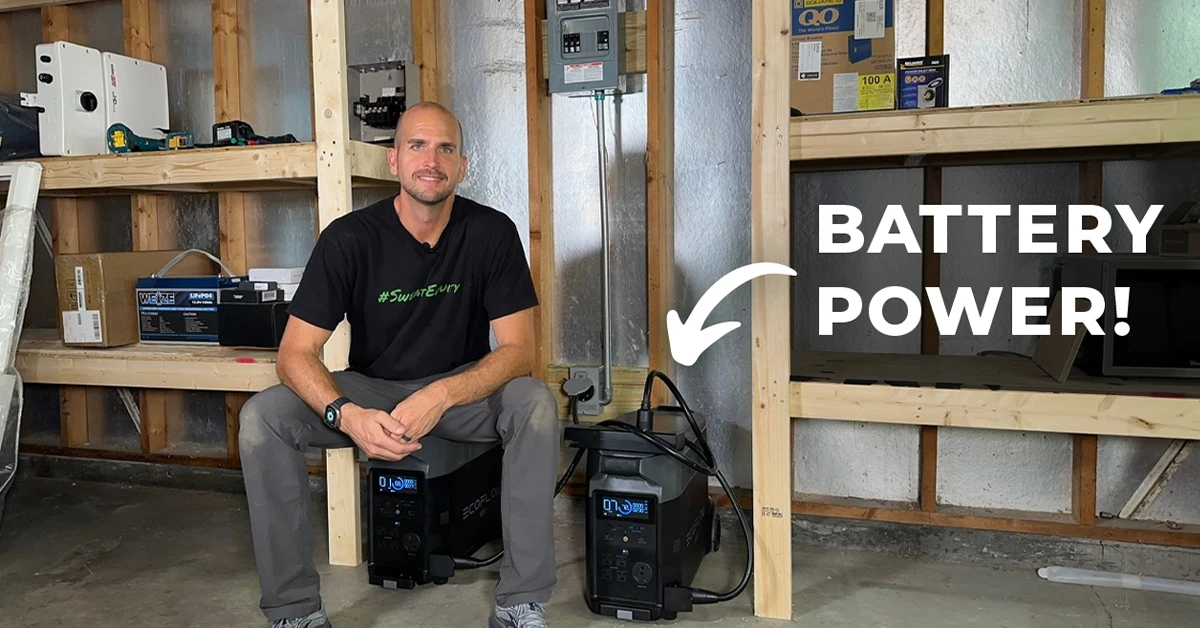
So, let me walk you through what I did to get this setup off and running, powering my garage with two EcoFlow Delta Pros.
Rather watch than read? Check out this 7-minute video.
Upgrading the Electrical Panel for My Off-Grid Garage
First, I needed to upgrade the electrical panel. So I swapped out the old 4-space Cutler Hammer panel for an 8-space Square D QO panel.

This main lug panel is essential for future connectivity, as I plan to feed it from a 200-amp panel with a 60-amp breaker, making on-grid conversion a breeze.
Subpanel Challenge: Separating Neutrals and Grounds
Subpanels can present unique challenges, and one of the most common is the mixing of neutrals and grounds.
On the old Cutler Hammer panel, the neutrals (whites) and grounds were brought together. This should not be the case, so I separated them in my new Square D panel.

Remember, neutrals and grounds should only be connected at the main panel, not in subpanels.
Wiring and Future-Proofing
For wiring, I used 6-gauge THHN wire, typically used for 50-amp circuits, even though I’m currently using a 30-amp setup.
Why? Future-proofing.
This allows me the flexibility to upgrade to a 50-amp breaker and generator inlet down the line without rewiring.

Importance of an Interlock in On-Grid Scenarios
For those considering an on-grid setup with a generator inlet, installing an interlock is crucial.
An interlock prevents simultaneous power from the grid and alternative sources, avoiding potentially dangerous backfeeding scenarios. In my home, tied to the grid, I have an interlock system to ensure safety during power outages when I would feed my main panel from a generator inlet.
But in this case, since we have no connection to the grid, I’m bringing the 6-gauge THHN wire into a 30-amp breaker, powering the rest of the two different phases across the bus bars.
Grounding for Safety in My Off-Grid Garage
Since safety is paramount, I installed two 8-foot ground rods outside of the garage.

To see the ground rod installation process, watch this video over on my YouTube channel, Everyday Home Repairs. I show a few different methods on how to get them easily into the ground, including an effective one using water.
Inside the subpanel, I added a ground copper wire which ties into the separate ground bus bar—a missing feature in the old panel.

Installing the Generator Inlet
Since I’m going off-grid, I needed a reliable way to power the system.
The power will come from two EcoFlow Delta Pros in a Dual Voltage Hub, providing a 240-volt, 30-amp output. This setup ensures a plug-and-play experience for testing different configurations. (More details on the EcoFlows later.)
To connect the EcoFlows to the panel, I opted for a 30-amp generator inlet, connected to the subpanel via conduit and 6-gauge THHN wire.

Note: Always check local codes and regulations, even in rural areas. Following the National Electrical Code (NEC) is crucial for safety and the year of the code being enforced in your area could be different as compared to my area.
The EcoFlow Delta Pro: Plug-and-Play Powerhouse
Now, let’s take a look at the EcoFlow Delta Pros and the generator inlet.

These portable power stations are about as plug-and-play as it gets.
With a capacity of 3.6 kWh, they use lithium iron phosphate batteries designed for 3500 cycles while maintaining 80% capacity. Together, they provide 7.2 kWh of reliable power.
If you cycle them daily, you’re looking at about 10 years of use. Will they actually hold up to that? Only time will tell.
But with this connected up to the garage, I’m going to cycle them more than I have in the past, and I’ll get to test out their true capability.
Tying it All Together: The Dual Voltage Hub
The key to unlocking 240 volts is tying together two 120V 30A capable EcoFlow units in a dual voltage hub.

This provides the capability for a 240V 30A plug, which connects up to the generator inlet. That is how we’re able to get 240 volts out of these units.
Load Balancing Considerations
One disadvantage to this EcoFlow setup is that it doesn’t automatically balance loads.
If you’re drawing more power through one of the 120V leg than the other, be careful. You might find one unit draining quicker than the other, requiring you to manually switch over the plugs to ensure both batteries deplete evenly.
Build Your Own vs. Plug-and-Play
Considering building your own system versus using a portable power station? Let me know your preference in the comments.
EcoFlow Delta Pros offer convenience, but building a custom system provides more flexibility and some times has cost savings.
The Road Ahead: Exploring Different Setups
In upcoming posts, we’ll explore ground-mounted and roof-mounted installations, testing different setups.
Figuring out the wiring for these setups is crucial. So if you need some guidance, check out our article that explains the differences between series, parallel, and series-parallel setups.
Seeking Your Feedback
Remember, I want to test out a lot of different systems, so I’d really like your feedback for future posts.
Feel free to share your thoughts in the comments, and let me know which setups you prefer or would like me to explore.
Solar for Your Home
If you’re considering a grid-tied solar system for your home, now is a great time with various federal, state, and municipal incentives available.
Click this link to get an estimate of the size and cost of your home’s solar system. If you decide to move forward in the process, you’ll also get information on trusted local installers.
Conclusion: My Off-Grid Garage Setup in a Nutshell
In conclusion, the combination of the upgraded subpanel, EcoFlow Delta Pros, and future-proofing sets the stage for a reliable and flexible power solution for my off-grid garage.
I hope this walk-through has been helpful as you embark on your own off-grid adventures. Stay tuned for more solar-powered projects!