
For my other YouTube channel, Everyday Home Repairs, I’ve created a video on how to install an Emporia Gen 2 Vue to better monitor your energy, and I wanted to share it here, too. If you’re interested in solar, knowing your energy consumption is crucial. You can find the video of the installation below, or keep reading to see the step-by-step text and pictures.
The Concept of Energy Monitoring
For the most part, we’re all interested in understanding how much energy our homes consume. For years, your primary source of such data has been your utility bill. This bill typically offers a bar chart displaying our monthly consumption. If you’ve got a smart meter installed in your home, you can dive slightly deeper into this data by accessing daily consumption figures through an online portal.
However, as an energy-conscious homeowner, I’ve always wanted to delve deeper. Here’s where Emporia’s energy monitoring system has proven to be a game-changer. This device has a centralized module that lets you connect 16 individual circuits.
Not only that, but it also features Hall effect sensors that you can position on your two phases conductors coming from your meter base to give you a near real-time view of your total energy consumption. The ability to track individual circuits provides a lot of valuable data on your energy consumption, offering a granular view of your usage.
The Installation Process of Gen 2 Vue: Module, Main Clamps, and Power
Now, let’s take a step-by-step tour of the installation process of Emporia’s Gen 2 Vue. Before we begin, a word of caution: if you are not confident around your electrical panel or if you’re unsure about the process, please consider hiring a professional electrician. Remember, safety first – the phases coming from your meter base are always live and can be very dangerous.

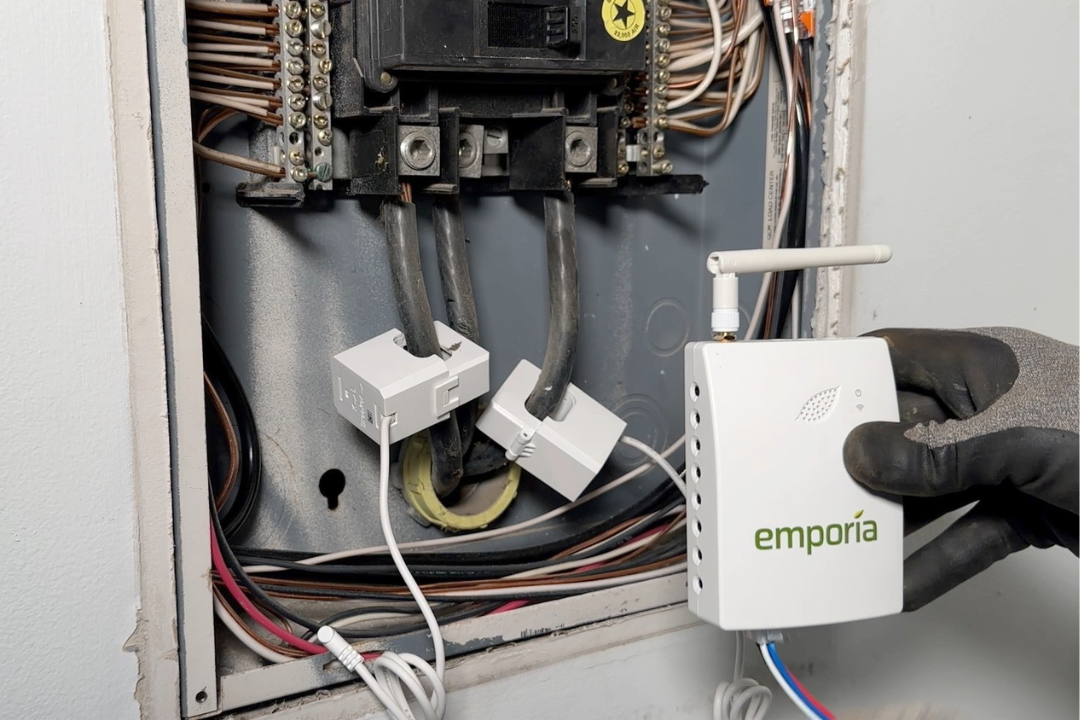
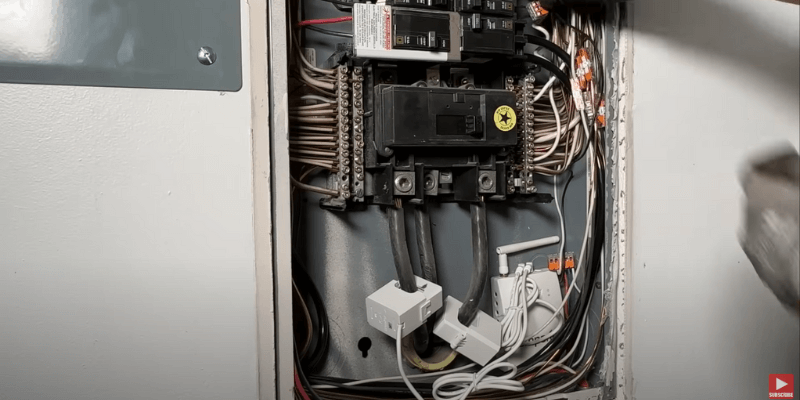
Placing the Module and Main Clamps
In my setup, I found it most convenient to position the module in the lower right-hand corner of my panel. Emporia thoughtfully provides an antenna with an extension harness, which you can use to extend the range. However, as my panel is flush-mounted, I removed the extension harness and use only the antenna.

Next up, it’s time to install the two main Hall effect sensors across the two phases. One vital point to note is that these sensors have a specific orientation. Be sure to install them correctly – the arrow should always be pointing towards the breaker.

Installation of the Power Harness
With wires coming in from both sides, things can get a bit crowded in the panel, so it’s essential to keep everything as neatly tucked away as possible. To keep things tidy, I decided to modify the harness slightly to avoid having excess wire.

I connected the neutral wire first, and then the black hot pigtail into a lightly loaded 20 amp breaker located towards the bottom of my panel. For the neutral and ground connections, I used a WAGO to bring all the wires together and connected them into the neutral bar, as specified in the instructions. It should be noted I originally only powered 1 wire (black) to the power harness but since I was monitoring 2 phases I needed to power both the black and red wires from separate circuit breakers.
Connecting and Testing Your Gen 2 Vue
Once the initial setup is complete, the next step is to test the connectivity of your module. This process involves connecting the module to your Wi-Fi network, syncing it with your phone via Bluetooth, and applying any firmware updates that may be available. Once these steps are complete, your module should be connected and ready to start monitoring your main sensors and your overall power and energy consumption.

When you bring up the Emporia app on your phone, you can immediately start examining your total home energy consumption. However, the real magic of Emporia’s system begins when you start monitoring your individual circuits.
Setting Up Individual Circuit Monitoring With Gen 2 Vue
While the overall power consumption data is undoubtedly valuable, the Emporia unit truly shines when you start monitoring individual circuits. To ensure comprehensive coverage of my home’s energy usage, I connected all of my 240-volt circuits and some crucial 120s.

It’s important to remember that the clamps have to be oriented in a particular direction to correctly read out the current, which then translates into power. Also you only need to use 1 clamp on most of your 240V breakers and there is a “x2” setting in the App that will allow you to correctly multiply the energy by 2 since you are only monitoring 1 of the 2 hot conductors on your 240V circuits.
Experience the Power of Whole Home and Circuit Monitoring With Gen 2 Vue
With everything now properly installed and the additional circuits ready for monitoring, you can begin comparing the overall energy consumption data from the two main clamps to that from the individual circuits. The resulting data gives you a clear picture of your energy consumption, which is indispensable if you want to optimize your energy use.
Knowledge is power, and understanding how energy is consumed in your home is the first step toward more efficient usage. From that, you can have substantial savings. With Emporia’s Gen 2 Vue, this process becomes significantly easier and more precise.
It doesn’t matter if you’re a homeowner tied to the grid or someone living off the grid with a solar power setup. This system will revolutionize how you monitor your energy consumption. If you’re interested in other ways to measure your energy usage, check out my post about using a smart meter.